
Toddler cutting is one of those small skills that looks simple until you watch a child coordinate two hands, keep the paper steady, and make the blades open and close in the right rhythm. I use it as a window into fine motor development: it tells me a lot about hand strength, attention, and how ready a child is for more structured play. In this guide I’ll cover when to introduce scissors, how to set up the first practice sessions, what tools work best, and what to do when progress feels slow.
The essentials parents need before starting scissors practice
- Most children start with snipping and open-close practice, not neat cutting.
- Child-safe scissors are the right starting point; household scissors should stay out of reach.
- Short practice blocks of 5-10 minutes work better than long craft sessions.
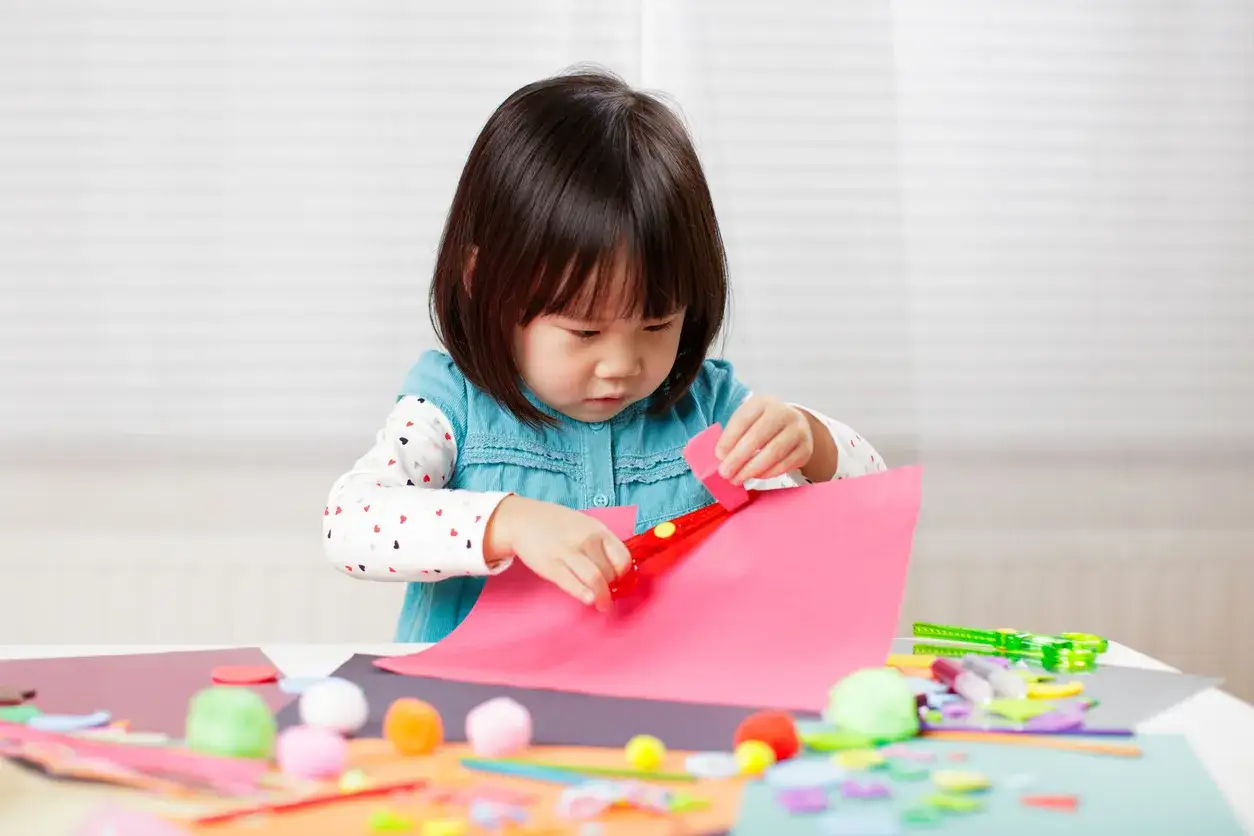
- Play dough, cardstock strips, and fringe cuts are easier than thin copy paper.
- Progress usually moves from snip to straight line to simple shapes. Clean edges come later.
What scissor play actually develops
What makes this skill worth the effort is not the paper shape itself. Cutting with scissors supports bilateral coordination, which means both hands doing different jobs at the same time, plus visual-motor integration, which is matching what the eyes see with what the hands do. It also builds finger strength, wrist stability, and attention span. I think of it as a tiny craft task with a much larger developmental footprint.
- Bilateral coordination - one hand opens and closes the blades while the other hand stabilizes the paper.
- Pincer strength - the thumb and fingers learn to control small movements more precisely.
- Wrist stability - the hand becomes steadier for drawing, coloring, and later writing.
- Eye-hand coordination - the child learns to aim and adjust based on what they see.
- Task persistence - the child practices stopping, aiming, and repeating without giving up too quickly.
That matters because the goal is not perfect craft pieces; it is controlled movement. Once you see that, the next question becomes when to start and what “ready” actually looks like.
When a child is ready to start
The American Academy of Pediatrics lists child-safe scissors among the hand-and-finger skills you often see in the 3-to-4-year range, and the CDC still includes safety scissors in the preschool creative-play toolkit. I use those ranges as a guide, not a deadline. If a child can sit for a few minutes, hold paper steady with one hand, and imitate an open-close motion without frustration, I usually start with low-pressure practice.
| Approximate age | What I usually expect | Good first goal |
|---|---|---|
| 2-3 years | Opens and closes scissors, may need two hands, may only explore the motion | Practice the open-close action and snip soft materials |
| 3-4 years | Uses child-safe scissors and begins snipping paper | Cut fringe, short strips, and simple straight marks |
| 4-5 years | More control with paper, better helper-hand use, more accurate line following | Follow short lines and try simple shapes |
I keep the ranges broad on purpose. Some children are ready earlier for snipping and later for accuracy, and that variation is normal. Readiness is less about age in isolation and more about posture, hand strength, and tolerance for a small challenge.
How I set up a safe first session
The setup changes the outcome more than people expect. A child who feels stable at the table is far more likely to succeed than a child who is twisting sideways on the floor with a giant sheet of paper.
- Use a stable chair and table so the child’s feet can rest on the floor or a foot support.
- Choose child-safe scissors with blunt tips and keep household scissors stored away.
- Start with short paper strips, not full sheets, so the motion stays manageable.
- Stay within arm’s reach and keep the blades pointed away from the face and body.
- Keep the first session to 5-10 minutes. I end while the child still wants more.
- Stop the moment the scissors become a toy for waving, running, or throwing.
The biggest safety rule is simple: if the child is moving, the scissors stop. That is also the cleanest way to teach respect for the tool without turning the moment into a lecture.
The best scissors and materials for each stage
Not all scissors teach the same thing. I choose the tool based on the movement the child needs to practice, not on what looks cute in the craft drawer.
| Tool or material | Best for | Why I use it | Watch out for |
|---|---|---|---|
| Blunt-tip child-safe scissors | First real cuts | They are easier to control and reduce risk | Still need close supervision |
| Left-handed scissors | Left-handed children | Better blade alignment and less awkward wrist twisting | Only helpful if the child truly favors the left hand |
| Spring-loaded scissors | Children who struggle to reopen the blades | The spring helps the hand reset after each snip | Use as a bridge, not a permanent crutch |
| Loop scissors | Very early practice or extra motor support | They reduce the amount of opening force needed | They can hide weak coordination if used too long |
| Cardstock strips and play dough snakes | Early practice materials | They give the child a predictable, forgiving target | Thin printer paper usually frustrates beginners |
If I want a child to learn fast, I start with a material that gives a little resistance, such as cardstock or play dough. Printer paper tears too easily, which makes some children think the problem is them when the problem is actually the paper.
- Use 1-2 inch paper strips before moving to full sheets.
- Try short fringe cuts along the edge of cardstock for an easy win.
- Use play dough ropes for children who need a softer, less slippery target.
- Save thin paper and intricate shapes for later, once control is steadier.
Common mistakes that make cutting harder than it needs to be
I see the same few mistakes over and over, and they all make the task feel bigger than it is.
- Starting with a full page instead of a narrow strip. A big page flops around and overwhelms beginners.
- Expecting a straight line before the child can snip. Straightness comes later.
- Correcting the grip every few seconds. That usually interrupts more than it helps.
- Giving too much help. If the adult holds the paper every time, the child never learns the helper-hand job.
- Practicing too long. Ten focused snips are often better than thirty tired ones.
- Using scissor time as a test. When a child feels watched, performance usually drops.
My rule is simple: if the child is still curious, keep going; if the child is frustrated, simplify the material rather than pushing harder. That brings me to the bigger question of when slow progress is still normal.
When slower progress is normal and when it deserves attention
Not every child moves through this skill at the same pace. A cautious 2-year-old who mostly opens and closes the blades is well within the normal range, and a 3-year-old who can snip but not follow a line is not automatically behind. What I watch for is a pattern that lingers even after short, gentle practice: no intentional open-close motion, no interest in stabilizing the paper with the helper hand, obvious one-sided weakness, or a broader struggle with other fine-motor tasks like crayons, utensils, or blocks.
- Check in with a pediatrician if the child is around 4 and still cannot snip at all with child-safe scissors.
- Ask about occupational therapy if cutting is hard along with dressing, utensil use, pencil grip, or hand fatigue.
- Take one-sided movement or stiffness seriously sooner rather than later.
I do not expect perfect scissor control before kindergarten, but I do expect some steady improvement over time. If the skill is stalled and the rest of fine-motor play looks difficult too, it is worth getting a closer look instead of waiting for it to sort itself out.
What I keep in the play drawer for easy scissor practice
The most useful setup is also the simplest. I like to keep a small drawer or tray with child-safe scissors, 1-inch paper strips, a few pieces of cardstock, play dough ropes, and a roll of tape for anchoring the paper. That gives me enough variety to make the task easier or harder without hunting through a craft closet.
- Child-safe blunt-tip scissors
- Short paper strips
- Cardstock pieces for sturdier cuts
- Play dough snakes or other soft, cuttable material
- A small table space with a stable seat and good light
If I had to reduce the whole topic to one idea, it would be this: keep scissors work short, safe, and slightly playful, and the skill usually grows without drama. The point is not to produce perfect crafts on day one; it is to help a child learn control, patience, and confidence one snip at a time.