
Painting a nursery is less about decoration than control: air quality, washability, light, and the way a color behaves once the crib, curtains, and toys move in. This guide shows how to paint a nursery room without the common mistakes that create extra fumes, patchy walls, or unnecessary rework. I focus on the steps that matter most in a real U.S. home, especially if the room has older paint or uneven daylight.
The safest nursery paint job balances low odor, easy cleanup, and patient drying
- Use a water-based, low-VOC paint; it usually dries faster and smells less than oil-based options.
- Eggshell or washable matte works well on walls, while semi-gloss is better for trim and doors.
- If the home was built before 1978, treat old paint as a lead risk until you know otherwise.
- Test large color samples on different walls, because nursery light changes the shade throughout the day.
- Plan for real drying time, not just touch-dry time, before the baby sleeps in the room.
Choose a finish and paint that work in a nursery
I start with the product, not the color. For nursery walls, I want a water-based acrylic latex, which is the common interior paint type that dries faster and cleans up with water, plus a low-VOC formula so the room does not hold onto heavy odor. The EPA recommends maximum ventilation during painting, and that advice matters even more in a baby's room.
| Finish | What it does well | What to watch for |
|---|---|---|
| Washable matte | Soft, low-glare look with better cleanup than older flat paint | Best on smooth walls; it can still mark if scrubbed hard |
| Eggshell | My usual all-around choice for nursery walls | Shows a little more wall texture than flat finishes |
| Satin | Very wipeable and a little more durable for toddler years | More sheen means more visibility for dents and patch lines |
| Semi-gloss | Ideal for trim, doors, and baseboards | Usually too shiny for full nursery walls |
If the wall surface is in decent shape, eggshell is the sweet spot I reach for most often. If the room will take more wear later, satin is the safer long-term call, but I still avoid putting extra sheen on rough drywall. Once the product choice is settled, the real difference comes from prep.
Prep the room so the paint can do its job
Even good paint looks weak over dust, grease, and old patch marks. I empty the room as much as possible, remove switch plates and outlet covers, wash sticky spots with mild soap and water, patch holes with lightweight spackle, and sand only after the repairs are dry. If I am changing from a dark color to a light one, I prime the patched areas and sometimes the whole wall so the final color lands evenly.
- Take down curtains, art, shelves, and anything else that can get in the way.
- Cover the floor with canvas or heavy plastic drop cloths.
- Vacuum baseboards, trim, and corners before taping.
- Use caulk on small gaps at trim joints if they are visible.
- Spot-prime stains, crayon marks, and repaired areas.
I keep painter's tape to a minimum because sharp cut lines are usually faster than fixing tape bleed. Once the room is clean and primed, the rest of the job starts to feel straightforward.
Check for lead before you sand or scrape
This is the part I would not skip in an older home. If the house was built before 1978, assume lead-based paint may be present until you have evidence otherwise; if the age is unknown, I would treat it the same way. The EPA says to use lead-safe work practices in that situation, and that means avoiding dry sanding, aggressive scraping, and any cleanup method that spreads dust into the rest of the home.
- Test the painted surface or hire a certified lead inspector if the room is old or peeling.
- Contain the work area with plastic and keep children and pets out.
- Use wet methods or HEPA-rated cleanup tools if lead is a possibility.
- Do not use open-flame stripping or high-heat tools on suspect paint.
If the walls are sound and the home is newer, the risk drops a lot, but a quick age check takes far less time than undoing a dust problem later. Once the safety question is settled, color becomes the fun part again.
Pick a color that still feels right after the crib stage
I do not choose nursery color from a tiny chip. I paint two or three large samples, about 2 feet square each, on different walls and leave them up for at least a day. Morning light, afternoon shade, and lamp light can make the same color read warmer, cooler, or duller than it looked at the store.
| Color family | Why it works | Best fit |
|---|---|---|
| Warm white or cream | Brightens small rooms and pairs with almost any fabric | Low-light rooms and minimalist setups |
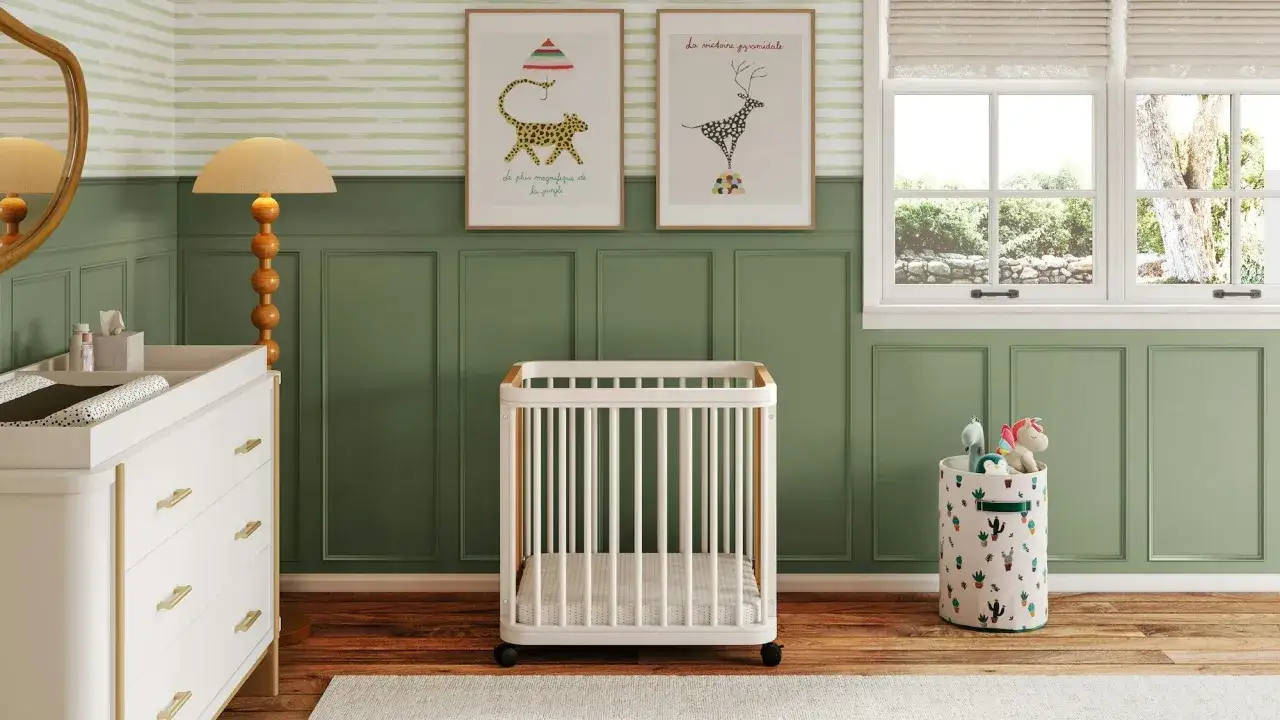
| Sage or muted green | Calm, natural, and easy to live with as decor changes | Rooms with wood furniture or steady daylight |
| Dusty blue | Soft and restful without feeling flat | Sunny rooms or spaces that run warm |
| Mushroom or greige | Flexible, grown-up, and easy to match later | Parents who want a timeless backdrop |
Sherwin-Williams and Benjamin Moore both lean toward gentle greens, warm neutrals, and soft blues for nurseries, and I think that direction works because it stays calm without looking childish. North-facing rooms tend to cool colors down, while south-facing rooms push them warmer, so I always check the same sample in more than one kind of light. That is the simplest way to avoid a color that looks beautiful on a card and strange on the wall.
Paint in the order that keeps edges clean
Once the palette is set, the sequence matters more than most people expect. I usually paint the ceiling first if it is being changed, then trim, then walls, and I finish with touch-ups after the second coat is dry. A 3/8-inch nap roller, which is the medium-thickness cover I use on smooth drywall, gives me the cleanest wall finish in most nurseries.
- Cut in corners and edges with an angled brush.
- Roll the wall in 3- to 4-foot sections while the previous pass is still wet.
- Keep a wet edge, which means overlapping into paint that has not dried yet to avoid lap marks.
- Wait for the label's recoat time before the second coat.
- Remove tape before the paint fully hardens so the edge stays crisp.
If you only remember one practical detail, remember this: do not rush the second coat. A nursery wall that dries evenly will look better under soft lamp light, and that is where you notice flaws most. From there, the remaining question is usually time and budget.
How much time and money to set aside
A standard 10x12 nursery with 8-foot ceilings usually needs about 2 gallons for two coats if the coverage is average. In the U.S., I usually plan the project like this:
| What you need | Typical range | What it covers |
|---|---|---|
| Low-VOC interior paint | $35-$80 per gallon | About 350-400 sq ft per coat, depending on the product and wall texture |
| Primer | $20-$60 | Useful for patched walls, stains, and big color changes |
| Tools and supplies | $40-$120 | Brushes, rollers, tape, tray, drop cloths, caulk, and cleanup items |
| DIY total for one nursery | $120-$300 | Usually enough for a simple room without ceiling work |
| Professional painting | $500-$1,500+ | Prep-heavy rooms, tall ceilings, trim, and local labor can move this up fast |
For time, I plan one day for prep and the first coat, then at least another half day for the second coat and cleanup. Full cure often takes 2-4 weeks, which is the point when the paint has truly hardened, so I keep heavy furniture moves and wall hanging to a minimum until then. If the room is humid or the smell lingers, I give it more time instead of guessing.
The nursery setup I'd trust most
If I were painting a nursery today, I would keep the formula simple: low-VOC water-based paint, eggshell walls, semi-gloss trim, a warm neutral or muted green, and strong ventilation until the room smells neutral. I would also use large sample patches and live with them for a day or two before buying the final gallons; that one habit prevents more regrets than any product choice.
- Choose a finish for cleaning first, then choose the color.
- Keep dust and old paint under control before any sanding.
- Ventilate aggressively and do not rush reentry.
- Pick a shade that works with the room's light, not just with a paint chip.
- Stop and check for lead risk if the home is older or the paint is failing.
The best nursery paint job is the one that feels calm on day one and still looks easy to live with six months later.