
A good playroom is not about buying the biggest organizer or filling every wall with color. It works when the space matches how your child plays, how quickly you want cleanup to happen, and how much supervision the room needs. This guide on how to set up a playroom covers layout, safety, storage, toy selection, and the habits that keep the room useful after the first week.
The fastest way to build a playroom that stays useful
- Start with one clear job for the room, then design around that purpose.
- Use zones instead of stuffing every corner with toys.
- Anchor tall furniture, cover outlets, and keep small parts away from toddlers.
- Choose low, simple storage so children can put things away on their own.
- Keep only a manageable toy mix on display and rotate the rest.
- Plan a short reset routine so clutter does not take over the room.
Start with the room you have and the child who uses it
I usually begin with a blunt question: what does this room need to do every day? A playroom for a toddler, a preschooler, and a school-age child can all look different, because the best setup follows the child’s stage rather than a design trend. If the room also doubles as a nursery, I make that decision early, because sleep, feeding, and active play need different zones.
| Child’s stage | What matters most | Layout bias |
|---|---|---|
| Toddler | Open floor space, low storage, very large toys | Simple, soft, and easy to supervise |
| Preschooler | Pretend play, blocks, art, and cleanup independence | Clear zones and visible labels |
| School-age child | Projects, reading, collections, and quieter focus time | Stronger storage and a calmer corner |
| Mixed ages | Separation of small parts and age-specific toys | High and low storage with rotation |
Before I buy anything new, I pull everything out and sort it into keep, donate, rotate, or store elsewhere. That one pass tells me whether the real problem is too many toys, bad furniture, or simply no system at all. In the U.S., I think of a basic functional reset as roughly $150 to $400, a fuller room as $500 to $1,200, and anything above that as a more complete build-out with nicer furniture or built-ins. Once the room’s job is clear, the layout becomes much easier to solve.
Map the room into zones that are easy to maintain
A zone is just a small area with one main purpose. I like this approach because it reduces visual noise and makes cleanup less emotional. Instead of a room that says “everything everywhere,” you get a space that quietly tells a child where to play, where to read, and where things belong when the game is over.
- Active zone for movement toys, large building pieces, and indoor gross-motor play.
- Quiet zone for books, puzzles, stuffed animals, and solo play.
- Creative zone for crayons, stickers, scissors, paint, and project work.
- Storage zone for rotation bins, backup toys, and seasonal items.
If the room is small, combine zones instead of adding more furniture. I would rather have one strong reading corner and one strong play shelf than three half-finished areas. Keep a clear path through the room if you can, and aim to leave about 30 inches of walkway wherever traffic naturally flows. That keeps the space usable for both children and adults, which matters more than decorative symmetry.
Once the zones are in place, the next priority is safety, because a beautiful layout is not worth much if the room creates avoidable risk.
Make the room safe enough that play can stay relaxed
This is the part I never treat as optional. CPSC’s Anchor It! guidance is the first thing I follow: bookcases, dressers, wall shelves, and TV stands get anchored, not merely “placed carefully.” Kids climb, pull, and lean on furniture far more often than adults expect, and tip-over risk is not a theoretical problem.
- Anchor tall furniture and keep heavier items on lower shelves.
- Use outlet covers or tamper-resistant receptacles on exposed electrical points.
- Keep cords, charging cables, and blind cords out of reach and out of play paths.
- Add non-slip backing under rugs so the floor does not slide under active play.
- Choose rounded edges or soft bumpers for sharp corners if the room is tight.
- Store collectibles, breakables, and anything fragile in a closed cabinet or high shelf.
I also lean on HealthyChildren’s toy guidance when I sort what stays in reach. Small parts, loose magnets, and button batteries do not belong where toddlers can grab them, even if an older sibling uses them safely. If the room is shared, I separate the younger child’s toys from older children’s materials instead of trusting everyone to remember the rules every time. That single decision removes a lot of stress and makes the room easier to trust.
Once the room is safe, storage becomes the next design decision, because children cannot use a system they cannot understand.
Choose storage children can understand and actually use
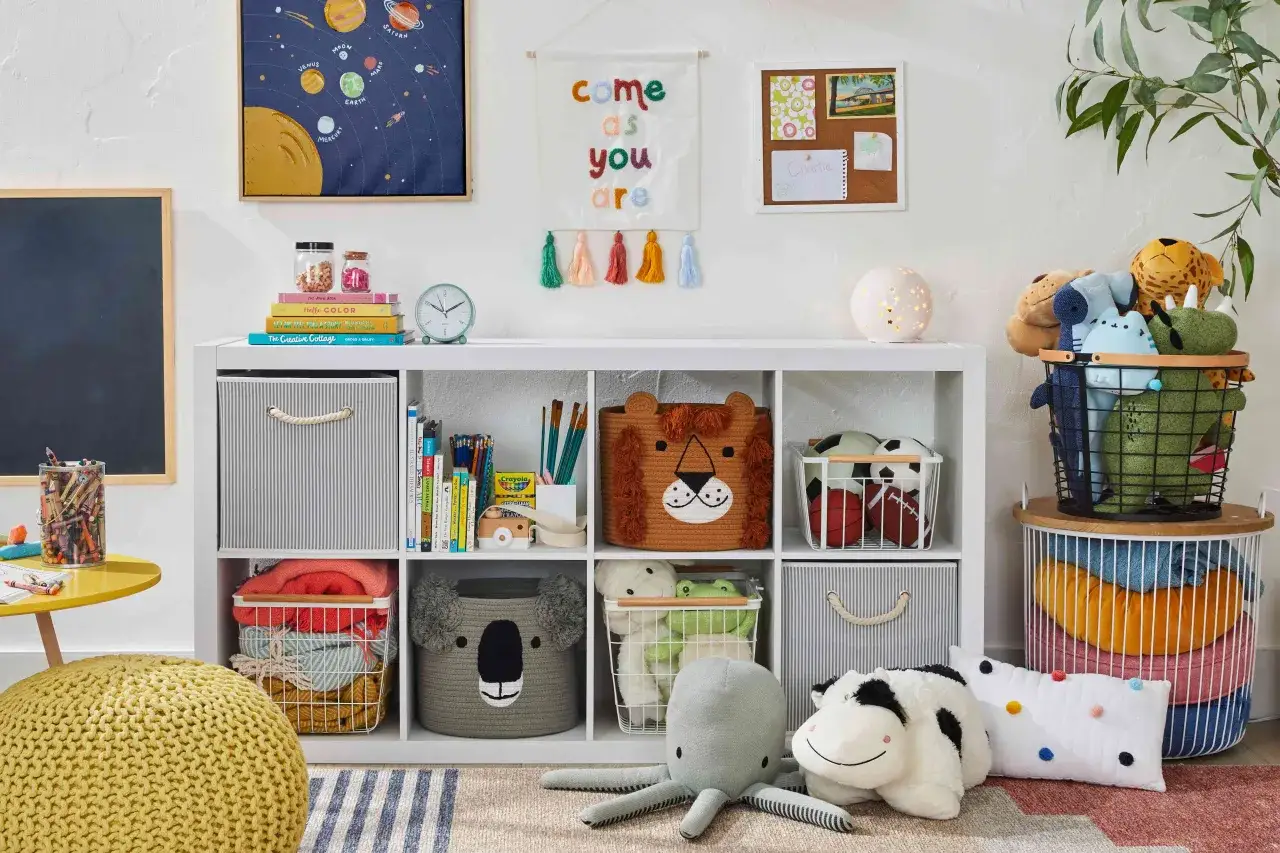
The best storage is the kind a child can read with their eyes and use with their hands. If cleanup requires adult translation, the system is too complicated. I prefer low open shelving for daily toys, labeled bins for categories, and a few closed containers for small pieces that would otherwise disappear.
| Storage type | Best for | Main tradeoff |
|---|---|---|
| Open cubes | Blocks, dolls, pretend food, and board games | Looks messy if overfilled |
| Clear bins | Small sets, crafts, and collectibles | Still need labels to stay organized |
| Lidded bins | Rotation stock and seasonal items | Slower for children to access alone |
| Baskets | Stuffed animals, dress-up accessories, and soft props | Poor for tiny pieces |
| Wall hooks | Costumes, art smocks, backpacks, and headphones | Can look cluttered if overloaded |
My rule is simple: one container, one category. A picture label helps pre-readers, and word labels help older kids learn where things belong. I also split storage into two heights. Everyday toys go low enough for independent use, while rotation bins and backup items live higher up or in a closet. That gives the room a cleaner look without making it less practical.
With storage under control, the toy mix itself becomes much easier to manage, and the room starts to support better play instead of just more stuff.
Build a toy mix that invites better play
I like fewer, better-chosen toys over a room full of novelty. A thoughtful toy mix creates deeper play, easier cleanup, and less decision fatigue for both children and adults. In practice, that means choosing toys that can be used in more than one way instead of toys that only do one thing and then get ignored.
- Building toys like blocks, magnetic tiles, and stacking pieces for problem-solving and spatial thinking.
- Pretend play items like dolls, figures, play food, costumes, and a simple kitchen set.
- Creative materials like crayons, paper, stickers, and kid-safe scissors.
- Quiet play options like books, puzzles, board books, and matching games.
- Movement play items like tunnels, soft climbers, or balance toys if the room has enough open floor space.
If I have to choose between a flashy electronic toy and a toy that invites conversation or imagination, I almost always choose the second. A set of blocks can be a castle, a road, or a zoo; a one-button toy usually stays a one-button toy. That difference matters because the room should support repeat play, not just short bursts of noise. If you want the space to feel calmer, keep the biggest impulse toys out of the main zone and rotate them in only when they still feel interesting.
Once the toy mix is right, the final challenge is keeping the room useful after the first wave of excitement passes.
The setup that still works after the toys multiply
A playroom fails when it is designed for the first day, not the fiftieth. I keep the long-term routine very simple: a short daily reset, a weekly edit, and a deeper toy rotation every 4 to 6 weeks. That rhythm keeps clutter from becoming permanent and makes it easier to notice what your child actually uses.
- Do a 10-minute nightly reset and put items back in their zones.
- Remove broken toys, missing pieces, and anything your child has clearly outgrown.
- Rotate one category at a time instead of emptying the entire room.
- Recheck labels and storage height as your child gets taller and more independent.
- Leave one shelf or bin partially empty so new interests have room to land.
That last point matters more than people think. A playroom that is 100% full looks finished, but it is harder to maintain and less inviting for real play. I would rather leave breathing room, keep the floor clear, and let the room evolve with the child than pack everything in at once. If you remember only one thing, make it this: the best playroom is easy to understand, safe to use, and simple to reset. When those three pieces are right, everything else starts to fall into place.